Introduction
Chances are you have heard about IoT or “Internet of Things”. It’s a big area of tech that estimates over 20 Billion IoT devices by 2020. Also, companies are likely to invest around $15 Trillion in IoT between 2017 and 2025. In this tutorial, we will dive into the world of IoT to obtain an understanding of what it takes to interact with these devices. While our example is simple, you can use these building blocks for more complex examples. Asset tracking or remote control of water pumps are just a couple of examples of what you could build. The possibilities are endless when you connect the Internet to things!
Requirements
- You are familiar with the terminal (command line)
- You have Composer globally installed
- You are familiar with PHP and Laravel
- You can create a Laravel project
- You have MySQL installed locally
- You are familiar with Particle.io Web IDE and C++
- You have a Particle.io Electron development board and Twilio SIM
- You have your Twilio SIM registered on your Twilio account
Programmable Wireless Setup
The first thing we need to do is verify our Twilio SIM is ready by navigating to the console and confirming your SIM has an ‘Active’ status. If you need additional support with preparing your SIM, please visit this Twilio Doc to help you get prepared.
Hardware Setup
For this example, we are using a Particle.io Electron 3G development board along with a Relay Shield board. Both parts can be sourced from Particle’s online store. Insert your ‘Active’ SIM into your Electron, specifically “SIM Card Holder” #4.

Next, power up your device and follow the 3rd-Party SIM setup from Particle. Once you have your Electron online and breathing cyan you are prepared to move onto the next step.
Create a New Laravel App
Now that you have a Twilio powered IoT device on the network and accessible from anywhere, it’s time to create our web application so that we can interface with it. Let’s start by running the following command in terminal:
$ laravel new TwilioIoT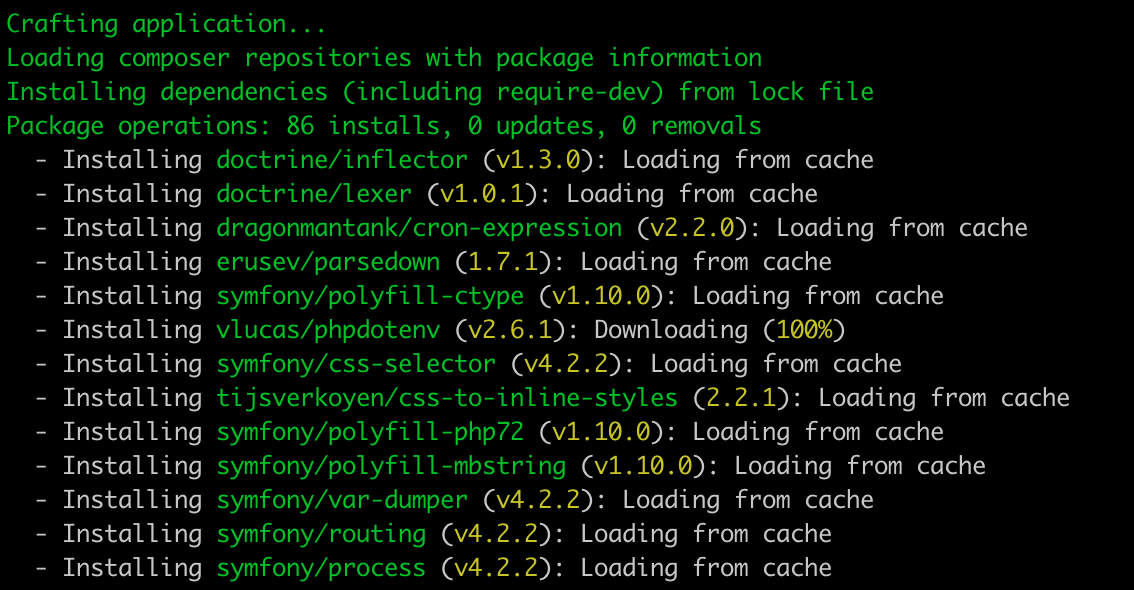
Then add the Twilio SDK to your project.
$ composer require twilio/sdkWith our Laravel App created and our Twilio SDK installed, we are now ready to create our environment variables file. There is a starter file in your project folder named `.env.example` that we can copy to get us started. Simply run the following command to create your file.
$ cp .env.example .env Then add the following variables to the bottom of your new .env file.
TWILIO_ACCOUNT_SID=’ACxxxxxxxxxxxxxxxxxxxxxxxxxxxxxxxxxxxx’
TWILIO_ACCOUNT_TOKEN=’xxxxxxxxxxxxxxxxxxxxxxxxxxxxxxxxxxx’
Next, update your `config/services.php` file so we can make these variables accessible in our application code.
'twilio' => [
       'sid' => env('TWILIO_ACCOUNT_SID'),
       'token' => env('TWILIO_ACCOUNT_TOKEN'),
   ],
Create Controllers
With our environment setup we can create our applications controller. Run the following command to create a blank controller file where we will add our actions.
$ php artisan make:controller WirelessControllerFirst, let’s make sure we include the Twilio API SDK by adding the following to our list of namespaces right before the `class WirelessController` definition:
use Twilio\Rest\Client;The following code will allow us to view any SIM associated with your Twilio account. Later, we will setup the view blade that is referenced in this action.
/** SIM List Page */
   public function Show()
   {
       $client = new Client(config('services.twilio.sid'), config('services.twilio.token'));
       $sims = $client->wireless->v1->sims->read();
       return view('sims', ['sims' => $sims ]);
   }
Now let’s add the other actions we will need. These will be the “Detail” and “Send” actions. The “Detail” action will allow us to show details about any particular SIM that a user wants to click on. The “Send” action will allow our users to send machine-to-machine commands to our device via the Twilio SDK.
/** SIM Detail Page */
   public function Detail(Request $request)
   {
       $client = new Client(config('services.twilio.sid'), config('services.twilio.token'));
       $simSid = $request->simId;
       $sim = $client->wireless->v1->sims($simSid)->fetch();
       $commands = $client->wireless->v1->commands->read(['sim' => $simSid]);
       return view('detail', ['sim' => $sim, 'commands' => $commands]);
   }

   /** Send Command to SIM */
   public function Send(Request $request)
   {
       $client = new Client(config('services.twilio.sid'), config('services.twilio.token'));
       $simSid = $request->input('sid');
       $command = $request->input('command');
       $client->wireless->v1->commands->create($command,
           array("sim" => $simSid)
       );
       return redirect()->back();
   }
Now let’s add our applications layout file. In your `/resources/views/` folder create a new file called `app.blade.php` and just copy and paste the following example code into it. As you can see, this file defines which fonts and styles we will use in our app. It also includes a placeholder for any additional scripts or content we will add. We will reference this file in the following steps to create our new pages.
<!DOCTYPE html>
<html lang="en">
<head>
   <!-- Meta Information -->
   <meta charset="utf-8">
   <meta charset="utf-8">
   <meta http-equiv="X-UA-Compatible" content="IE=edge">
   <meta name="viewport" content="width=device-width, initial-scale=1">
   <title>@yield('title', config('app.name'))</title>
   <!-- Fonts -->
   <link href='https://fonts.googleapis.com/css?family=Roboto:300,400,600' rel='stylesheet' type='text/css'>
   <link href='https://cdnjs.cloudflare.com/ajax/libs/font-awesome/4.7.0/css/font-awesome.min.css' rel='stylesheet' type='text/css'>
   <!-- CSS -->
   <link href="css/app.css" rel="stylesheet">
   <!-- Scripts -->
   @yield('scripts', '')
</head>
<body>
   <div id="spark-app" v-cloak>
       <!-- Main Content -->
       <main class="py-4">
           @yield('content')
       </main>
       <!-- Application Level Modals -->
   </div>
   <!-- JavaScript -->
   <script src="{{ mix('js/app.js') }}"></script>
   <script src="/js/sweetalert.min.js"></script>
</body>
</html>
Cool. Now we need to create our blade views that we referenced in our controller actions. The first blade view we will create in the `/resources/views` folder is the “SIM List” view. Be sure to name it `sims.blade.php`. This view will do two things, list all associated SIMs and add an action to view details of the SIM. Make sure to add the `@extends(‘app’)` so that we import our `app.blade.php` file from above. Next, add the `@section(‘content’)`. This is where we will show our list of SIMs on the page and create a link so users can navigate to the action page.
@extends('app')
@section('content')
<div class="container">
   <div class="row justify-content-center">
       <div class="col-md-8">
           <div class="card card-default">
               <div class="card-header">List of SIMs</div>
                   <div class="card-body">
                       <div class="table responsive">
                           <div class="table table-sm">
                               <table>
                               <thead>
                                   <tr>
                                   <th scope="col">Name</th>
                                   <th scope="col">SID</th>
                                   <th scope="col">Updated</th>
                                   </tr>
                               </thead>
                               <tbody>
                               @foreach ($sims as $sim)
                                   <tr>
                                       <td>
                                           <a class="btn btn-block btn-dark" href="{{ action('WirelessController@Detail', ['simId' => $sim->sid]) }}" >{{ $sim->uniqueName }}</a>
                                       </td>
                                       <td>
                                           {{ $sim->sid }}
                                       </td>
                                       <td>
                                           {{ $sim->dateCreated->format('d/M/Y h:m') }}
                                       </td>
                                   </tr>
                               @endforeach
                               </tbody>
                               </table>
                           </div>
                       </div>
                   </div>
               </div>
           </div>
       </div>
   </div>
</div>
@endsection
Great, now we can create the detail view for our SIM, which we will name `detail.blade.php`. This view will provide more SIM details, like a command history table and a way for us to send machine-to-machine messages.
@extends('app')
@section('content')
<div class="container">
   <div class="row justify-content-center">
       <div class="col-md-10">
           <div class="card card-default">
               <div class="card-header">SIM Details for {{ $sim->uniqueName }}<a href="/home" class="btn btn-sm btn-success pull-right">SIM List</a></div>
                   <div class="card-body">
                   <div class="row">
                       <div class="col-md-6">
                           SIM ID - {{ $sim->sid }} <br>
                           Updated - {{ $sim->dateCreated->format('d/M/Y h:m') }}
                       </div>
                       <div class="col-md-6">
                       <form action="{{ route( 'send-command', [ 'sid' => $sim->sid ] ) }}" method="post">
                           @csrf
                           <div class="row">
                               <div class="col-md-6">
                                   <div class="form-group">
                                       <select class="form-control" id="command" name=”command”>
                                           <option>Open</option>
                                           <option>Close</option>
                                       </select>
                                   </div>
                               </div>
                               <div class="col-md-4">
                                   <button type="submit" class="btn btn- block btn-primary">Send</button>
                               </div>
                           </div>
                       </form>
                       </div>
                   </div>
                   <hr/><h5>Log</h5>
                       <div class="table responsive">
                               <table class="table">
                               <thead>
                                   <tr>
                                   <th scope="col">Command</th>
                                   <th scope="col">Mode</th>
                                   <th scope="col">Receipt?</th>
                                   <th scope="col">SID</th>
                                   <th scope="col">Direction</th>
                                   <th scope="col">Status</th>
                                   <th scope="col">Transport</th>
                                   </tr>
                               </thead>
                               <tbody>
                               @foreach ($commands as $command)
                                   <tr>
                                       <td><small>{{$command->command}}</small></td>
                                       <td><small>{{$command->commandMode}}</small></td>
                                       <td><small>{{$command->deliveryReceiptRequested}}</small></td>
                                       <td><small>{{$command->simSid}}</small></td>
                                       <td><small>{{$command->direction}}</small></td>
                                       <td><small>{{$command->status}}</small></td>
                                       <td><small>{{$command->transport}}</small></td>
                                   </tr>
                               @endforeach
                               </tbody>
                               </table>
                       </div>
                   </div>
               </div>
           </div>
       </div>
   </div>
</div>
@endsection
One final step before we test the frontend is to specify our new routes that we referenced in our controller. Go to your `routes` folder and open the `web.php` file and include the following three lines.
Route::get('home', 'WirelessController@Show');
Route::get('detail', 'WirelessController@Detail');
Route::post('/command/send', 'WirelessController@Send’)->name(‘send-command’);
Great! Now that we have the frontend setup, let’s run the following command to fire up the server locally and verify the frontend is working.
$ php artisan serveNow open your browser and navigate to http://127.0.0.1:8000/home to see your SIM in the list.
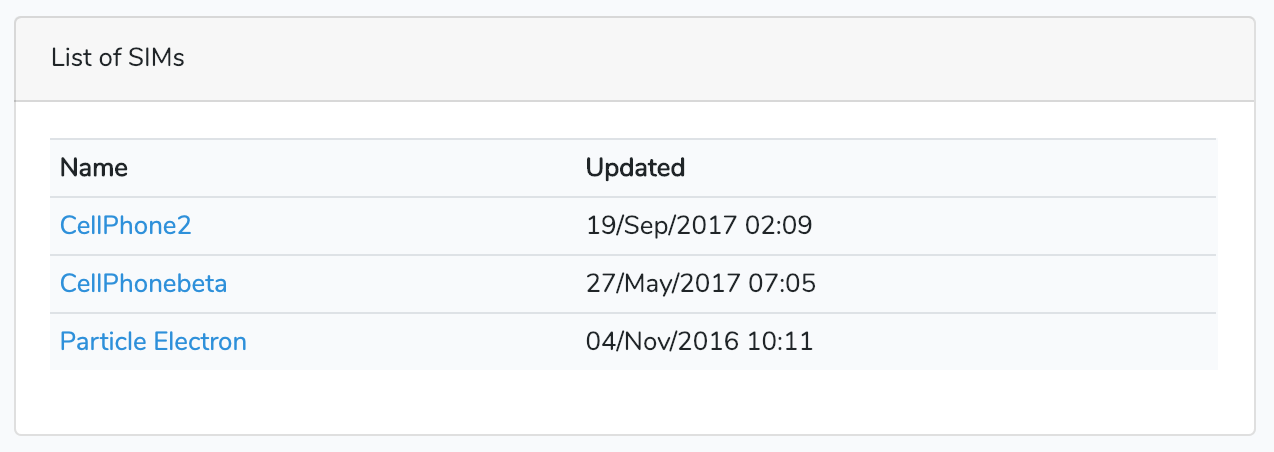
Now, click on your SIM name to view the details page. If you have not sent any messages to the SIM prior to loading this page, your “Command Log” section will be empty.
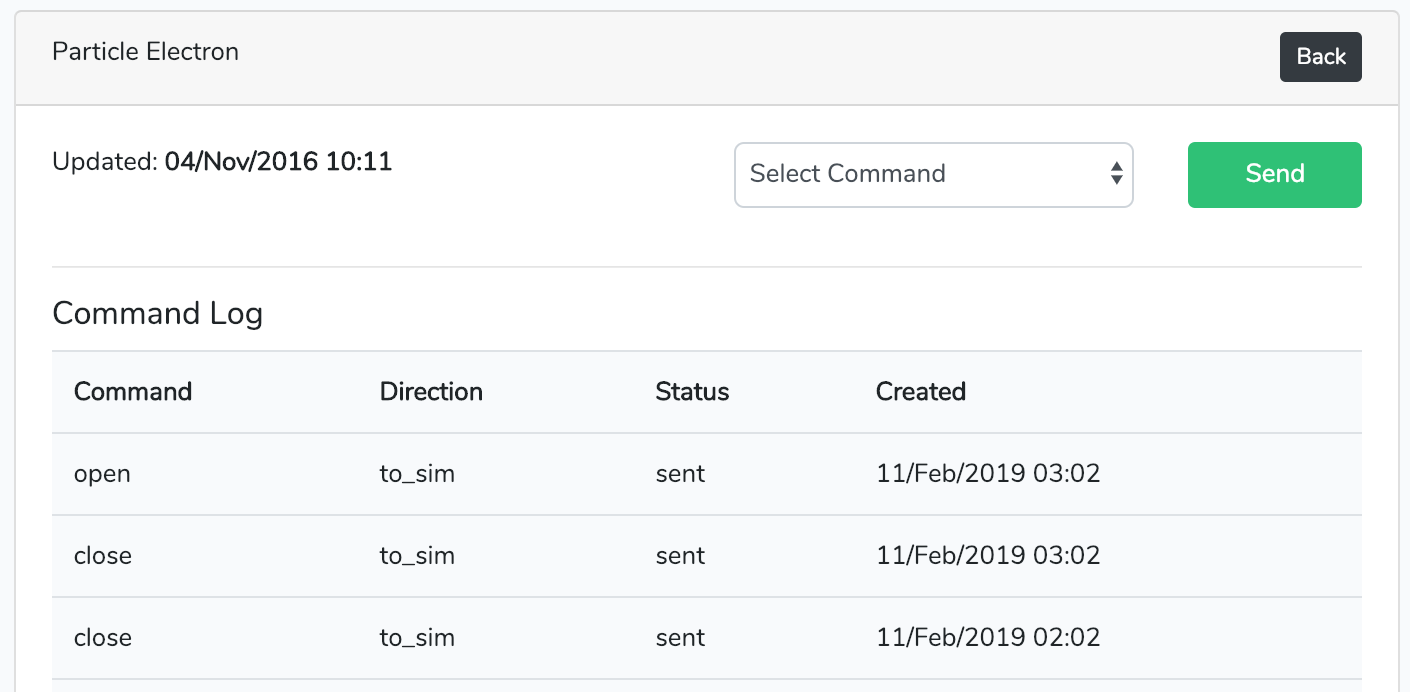
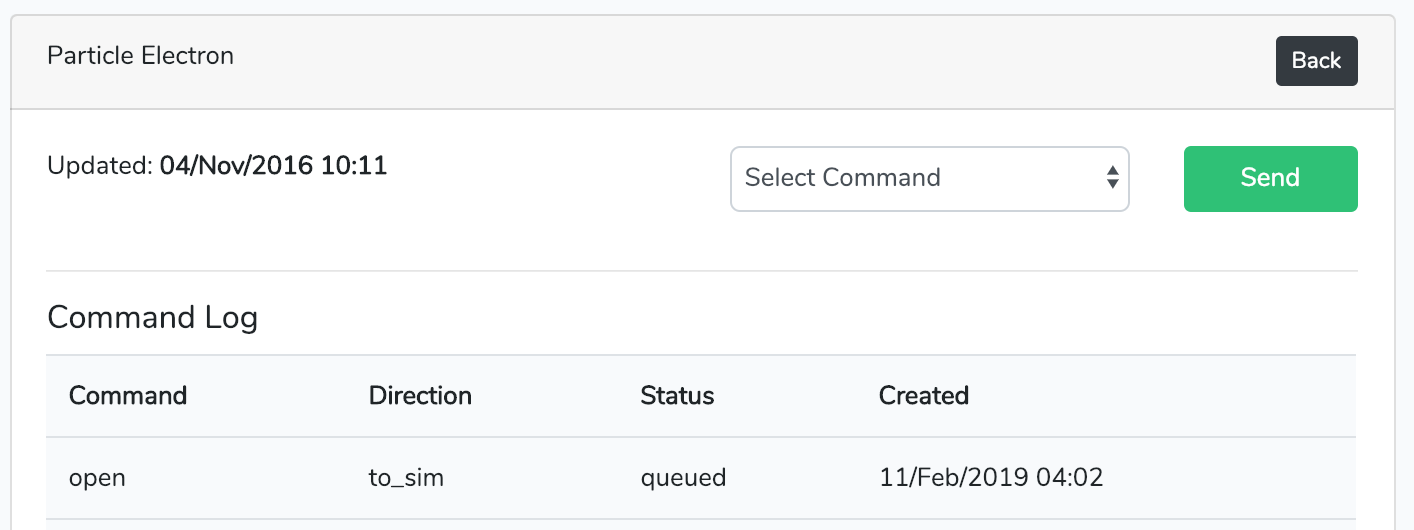
Things are working great. Even though our Electron IoT device code is not complete yet, let’s push a command to our SIM to verify our application can communicate with Twilio without issues. Click on the dropdown to select a command and then click on the “Send” button. The details page will reload and you should see the command you just sent to Twilio in the “Command Log” section.
If you made it this far, congrats! Now we are ready to write some code for our Electron device to receive these commands and control our onboard LED.
Electron Code
To begin writing your code for the Electron, open a browser and navigate to the Particles Web IDE. I have created a link that you can click on to load all the required code in the WEB IDE, which you can find here. After the WEB IDE loads you should see the App and can click on the “Copy this App” button.
Our Electron code will do the following:
- Connect to Twilio via the APN “wireless.twilio.com”
- Define our onboard LED (act as a relay) and smsBody variables
- Setup our “relay” pin mode and check for SMS Mode to verify proper setup.
- Enter a loop to check for incoming messages on the Electron Cellular Modem.
- If a SMS is received on the modem, we will check the smsBody
- If the body is “open” – we cycle the relay on for one second then turn it off.
- If the body is “closed” – we cycle the relay on twice at short durations.
- Once the message is processed/read, we delete it.
- Wait one second, then start the process over again.
- If a SMS is received on the modem, we will check the smsBody
First, we will verify our Electron device is selected as our destination device we want to flash our firmware code written to. In the left hand menu, click on the “Devices”. Now locate your Electron device in the list and make sure the start icon next to it is selected and highlighted in yellow. This will send our firmware code to this device when we “flash” it later.

Now, let’s flash our code! Before we can flash our code, let’s be cautious and make sure that it compiles without errors. This is a very safe practice when dealing with remote devices and firmware. Click on the checkmark button in the upper left menu.

If the code compiles without error you will see the following success message. You are now ready to flash the code to your Electron.

To flash, hit the lightning button in the upper left-hand menu. If all goes well, you will see a “flash successful” message. If your device is nearby, you will see your Electron’s onboard LED cycle in a magenta color. Once the Electron boots back up after the firmware update, you are ready to test command delivery to your Electron.
Testing
To fully test, send an “Open” command from the Laravel App to your Electron again. You should see the blue onboard LED turn on for one second and then turn off. If you send a “Close” command, you should see the LED cycle a couple times at short durations. You can control any external sensors or relays similar to how we interfaced with the onboard LED.

Conclusion
That’s it! You connected a PHP web application to an IoT device through the mobile network thanks to Twilio’s Programmable Wireless!
- Twitter: @cbackescom
- GitHub: cbackescom
- Website: cbackes.com
- Email: [email protected]